Unity Deferred Grass Rendering
Overview
Grass is an effect that can add a lot of detail and depth to your scenes and can be found in games across all genres. While Unity provides basic grass functionality using terrain detail layers, the official offerings can be a bit lacking. In this ramble we will implement a robust grass solution that can cover most needs, and can be applied to arbitrary objects and not just terrain.
Originally this was going to be a step-by-step, line-by-line walkthrough for writing a grass shader, however the resulting program is quite long as it utilizes all five shader stages. Which means it would take a long time to write it as a tutorial, and my time these days is very limited. Instead, the source can be found in the accompanying GitHub repository and this ramble will go over the various features of the grass, and how it is achieved at a high level.
The grass has the following features:
- Full lighting and shadowing support with the built-in deferred renderer.
- Configurable width and height, support for height maps to provide controlled variability to height.
- Configurable density using tessellation, and automatic dropoff at a distance.
- Projection bending/correction for high angle viewing.
- Wind using a distortion map, along with color highlights.
- Pushing/flattening using in-game objects, cutting, and growth.
Grass Shader File
The following files implement the grass effect:
Grass.shader: Defines the input and structure of the program.Grass.cginc: Implementation of the vertex, geometry, and fragment shaders.Tessellation.cginc: Implementation of the hull and domain shaders.
The grass has these input parameters:
Albedo Map: An RGBA texture placed onto our future grass quads. Anything not opaque will be removed via alpha cutout.Base Color: Tint applied to the base of the grass quad.Tip Color: Tint applied to the top of the grass quad, forms a gradient with theBase Color.Growth Map: Could also be called height map as it is sampled for the grass height.Dimensions: Vector where X = Max Width, Y = Max Height, and Z = Density.Wind Map: Distortion map that is sampled for the wind vector at a position.Bend Properties: Vector where X = Minimum Perspective Bend, Y = Maximum Perspective Bend.Disruption Map: Sampled texture where each channel is a different effect modifier. R = Flattening, G = Cutting, B = Burning, and Z = Growth.
Additionally, it expects the following global shader values:
_WindDirection: The normalized direction that the wind disruption map is scrolled._WindSpeed: The rate at which the wind disruption map is scrolled._WindStrength: The amount of force applied by the wind, which determines how much the grass is bent._CameraForwardVec: The forward vector for the camera._CameraTargetPos: The position that the camera is looking at. Used by the density dropoff.
Of course these don’t have to be treated as globals, but they are useful values that can be used by other shaders.
Grass Effects Explained
Generating Grass Quads
The input to the shader is typically a mesh representing a plane or terrain. For each triangle, the first vertex is used as the origin of the grass quad and the rest of the original vertices are tossed out.
A geometry shader is used to generate this quad from the original vertex. However, depending on the mesh topology, this can result in rather sparse grass. Tessellation is employed, via the hull and domain shaders, to split the original triangle into numerous parts which provides more triangles to feed to the geometry shader.
By using a single density parameter, we control both the edge and inside tessellation factors to split the source triangle. Meshes with larger world-space triangles will require a higher density setting in the applied material.
Transparency Using Deferred Rendering
In deferred rendering, transparency is not possible due to how the G-Buffer is generated and iterative passes are applied to the scene. However we wish to make use of the deferred renderer so that we can get lighting and shadowing on our grass with no additional effort on our part. So what do we do?
This is where alpha cutout comes into play, which allows us to essentially discard any fragments that are not opaque.
The effect is enabled in the .shader file for our deferred pass by declaring
AlphaToMask OnWhen enabled, the fragment is discarded when the alpha value for the diffuse value is not 1.0. For this shader, it is passed through the UnityStandardData.occlusion field as that is in turn assigned to the alpha channel of the diffuse GBuffer.
    UnityStandardData data;

    data.diffuseColor  = common.diffColor;
    data.occlusion     = min(color.a, cutAlpha);
    data.specularColor = common.specColor;
    data.smoothness    = common.smoothness;
    data.normalWorld   = common.normalWorld;

    UnityStandardDataToGbuffer(data, gbDiffuse, gbSpecular, gbNormal);
Here we take the lower value of either the source texture alpha or our cutAlpha variable. This variable is passed between the different stages and allows for the ability to override the cutout value, which enables effects such as cutting or removing grass. More information about this can be found in the Unity ShaderLab documentation.
Density Dropoff
One feature of this shader is support for controlling density dropoff, where the density value is automatically reduced as the grass gets further away from the camera target, provided via the _CameraTargetPos global.
This effect is implemented in the aptly named CalculateDensityDropOff function which makes use of an input _DensityDropOffMap. The map allows for an artist to be able to control exactly the gradient of the dropoff, which enables for a smoother transition from high density grass to areas of no grass.
Correcting for Perspective
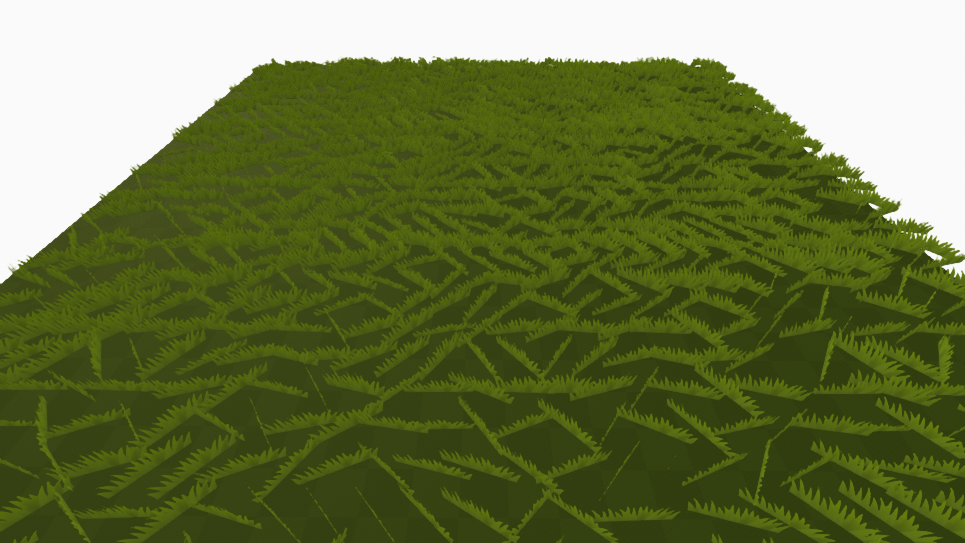
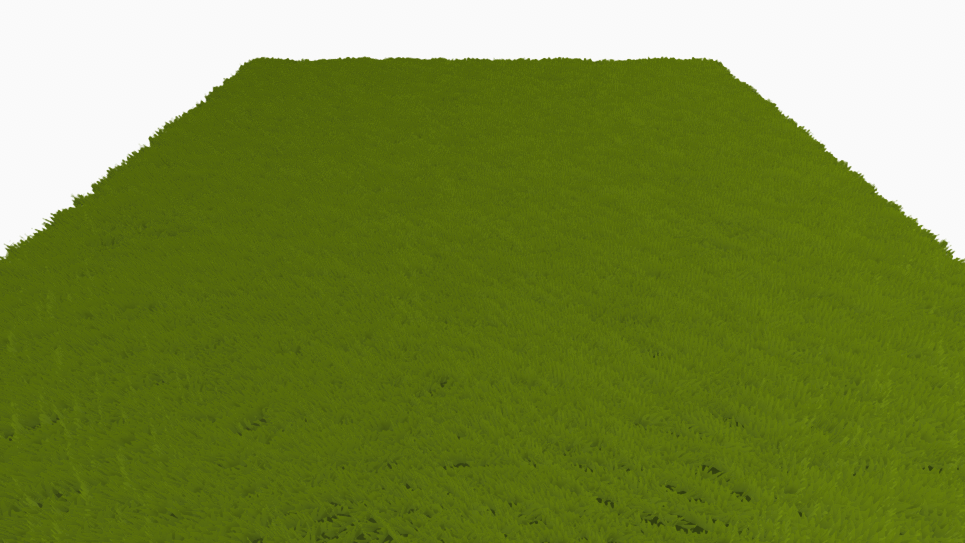
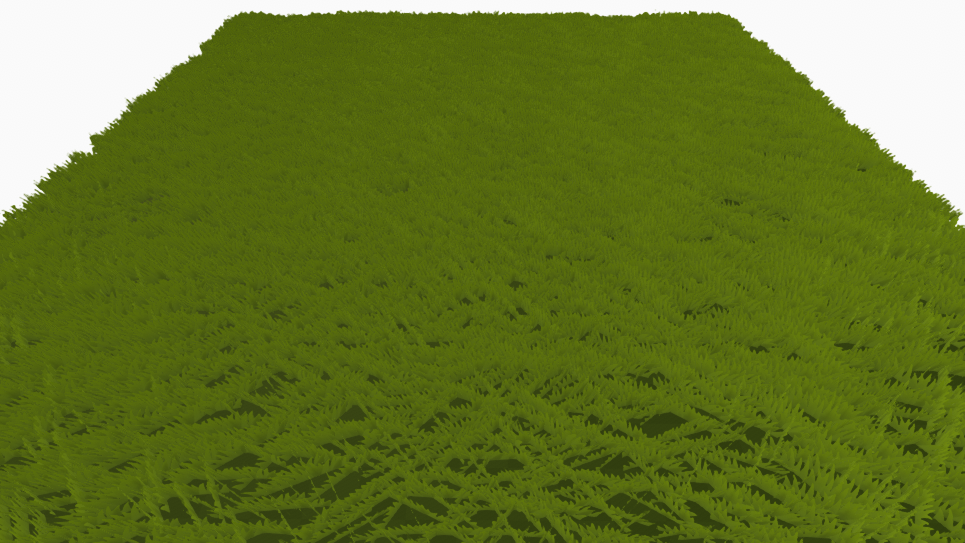
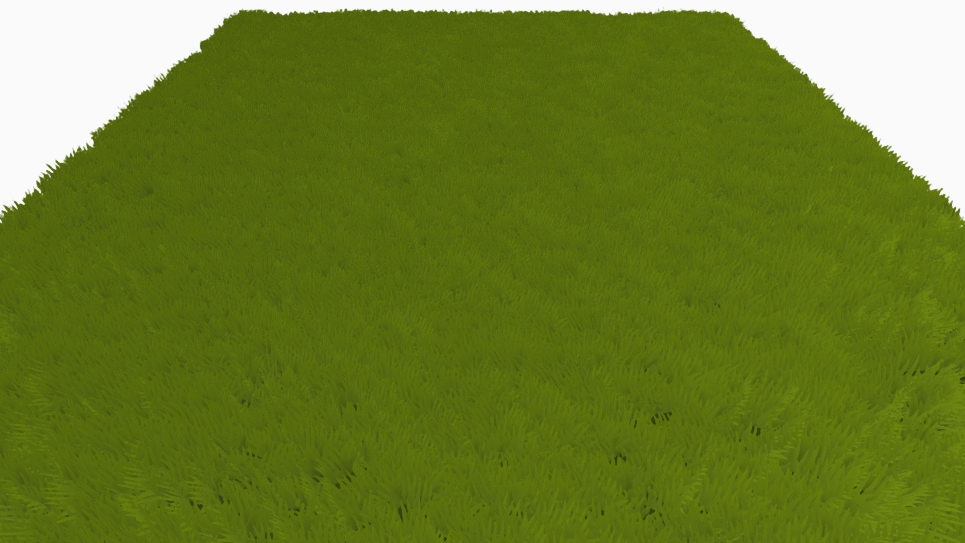
Most grass implementations only look good at a low view angle, such as traditional over-the-shoulder angles or first-person. When the angle increases or is top-down, the grass effect tends to break down completely.
The solution to this, that is employed in this shader, is to bend the grass quads so that they try to face towards the camera. Note that this is not a full billboard effect, as the blades do not fully rotate to face the camera but instead they tend to lean in a way that helps to hide the space between the quads. This is controlled via the GRASS_PERSPECTIVE_BEND constant that can be defined in the .shader.

This is implemented in the geometry shader using the PerformPerspectiveBend method. In it, we use previously found directional vectors (camera view, right, left) and actually perform a shear on the top vertices of the quad, shifting them along either the left or right local axis of the grass, depending on the camera view. If the right vector more closesly aligns to the view vector, then we shear on the right. Otherwise we shear on the left vector. Note that since quads are generated using a random rotation, some blades will shift more than others depending on their rotation and the camera direction.
Bending with Wind
A distortion map, along with speed and strength parameters, are used to mimic wind blowing through the grass.
Isn’t strength and speed the same thing for wind? Maybe in real-life, but here the speed is the scroll speed of the distortion map.
The effect itself is achieved in the GetWindRotation and ApplyWindRotation methods which simply rotate the top vertices of the grass quad around the local origin. The direction of rotation is determined by the sampled distortion map, and the amount rotated is a combination of the distortion map and the strength parameter. The higher the strength, the greater the bend.
Wind Highlights
Highlights are a small effect that can add a nice touch to the grass. It helps to visualize the wind, especially when the strength and subsequent bend is high.
They are implemented as an additive color that is applied when the grass bend angle is over a certain threshold. The additive effect is very simple, and does not perform any lerp or other considerations.
Flattening, Cutting, and Growing
Up to this point, the grass has become a nice passive effect for a scene but it is not interactive. To really bring it to life we want to be able to do the following:
- Flatten it while moving through it, especially when it is tall.
- Cut it down, whether by sword or by combine harvester.
- Grow it, using a very 00’s technique.
These particular effects are all achieved fairly easily in the shader itself, but they require some legwork within the actual application.
Note: At this point these effects are theoretically supported in the shader, but are unused. As this is the shader being used in Realms, these effects will be properly harnessed, explained, and demoed when they are fully implemented for that project.
At this point, I do not have the necessary time to fully implement them and it is a low priority for Realms. I hope to be able to revisit this section and these effects in the near future.
Even simple rambles such as this take a large amount of time to put together, and this one in particular has undergone a number of compromises in order to see the light of day. It was very nearly abandoned, but I felt that such a shader would be a good contribution to the community.
I apologize for any inconvenience.
Source Code
 See the code on GitHub: https://github.com/ssell/UnityDeferredGrass
Written against:
- Unity v2020.2.0f1